In scenarios where you want to put content within a UIScrollView, figuring out how to set up the hierarchy of views in Interface Builder can be confusing. To their credit, Apple provides a step-by-step guide to help you through this process. However, even with this guide, I still find myself reading through the steps multiple times before I get things working the way I want. Although I hope you find this blog helpful, I also selfishly write this for myself so that the next time I try to add a scroll view in Interface Builder I won’t have to bang my head on the desk for quite as long.
The Common Setup
In my experience, the most common need for a scroll view is to handle content that is expected to exceed the height of the screen. Therefore, the following steps will describe how to setup a vertically scrolling view.
Step 1
Add a UIScrollView and constrain its edges to the superview
Step 2
Add a UIView named “Content View” within the scroll view and constrain its edges to the superview (i.e. the scroll view)
We have now made it so that the Content View defines the scroll view’s content area. But notice how Interface Builder is complaining about missing constraints.
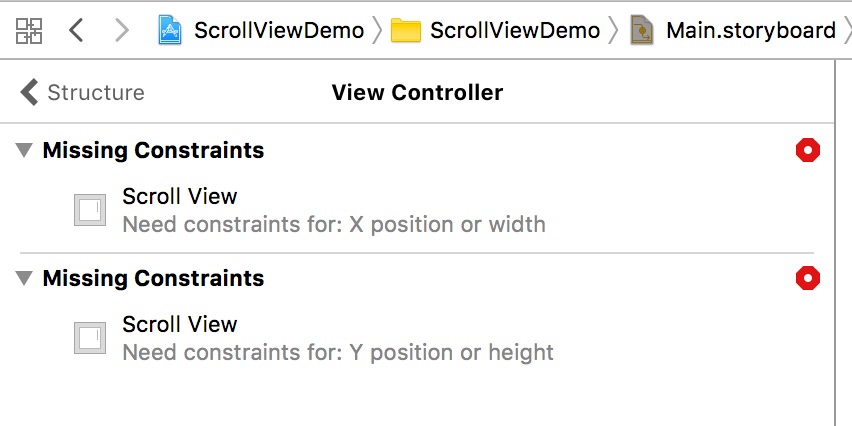
You might ask, “How can this be? We have constrained the scroll view to all edges of the super view. Why doesn’t the scroll view know its size?” This is where it’s important to note that scroll views behave differently depending on how constraints are added to them.
- Any constraints between the scroll view and objects outside the scroll view attach to the scroll view’s frame, just as with any other view.
- For constraints between the scroll view and its content, the behavior varies depending on the attributes being constrained:
- Constraints between the edges or margins of the scroll view and its content attach to the scroll view’s content area.
- Constraints between the height, width, or centers attach to the scroll view’s frame.
With these rules in mind, it’s easier to understand that these (albeit misleading) errors are actually talking about the inner content area of the scroll view. When we attached constraints from our Content View to the edges of the scroll view, we were attaching our constraints to the scroll view’s content area (which is not the same as its frame). Therefore our Content View still has no idea what size to be.
The content view does not have a fixed size at this point. It can stretch and grow to fit any views and controls you place inside it.
So at this point there are a couple things we can do to fix these missing constraint warnings. We can either add a constraint from our Content View to the height/width of the scroll view (so that our Content View is attached to the scroll view’s frame), or we can specify a height/width constraint on our Content View.
Step 3
Add optional height/width constraint on Content View
If we want to disable horizontal scrolling, we would set the Content View’s width constraint equal to the width of the scroll view. Likewise, if we wanted to disable vertical scrolling, we would set the Content View’s height constraint equal to the height of the scroll view. Doing this would make it so that the Content View fills the scroll view’s content area horizontally/vertically respectively.
In most cases, I want to disable horizontal scrolling so in this example I’ve added a width constraint on the Content View. But again notice that we are still missing constraints. This is because the Content View does not know how tall it should be.
Step 4
Add a height constraint on the Content View and check “Remove at build time”
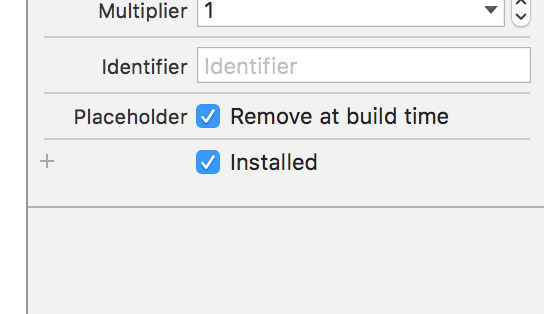
This step is basically a band-aid to make Interface Builder happy so that we can add elements inside the Content View without “missing constraint” errors. Although not required, I do find this step very helpful.
Step 5
Add your UI elements to the Content View and constrain them as normal
Note: You MUST fully constrain all elements (either vertically or horizontally) within the Content View. Since we are scrolling vertically in this example, we need to add constraints from top to bottom so that the scroll view can determine its height at runtime. This is key in order to have your scroll view working properly.
This part can get tricky in some situations, so the next section is dedicated to helping you (and me) to constrain specific UI elements so that our Content View is fully constrained. However, if you’ve followed these steps so far and understand how to fully constrain your UI elements, then you should have a functioning scroll view!
Fully Constraining the Content View
As mentioned earlier, “fully constrained” means that each element within the Content View must be constrained from top to bottom for vertical scrolling or from left to right when scrolling horizontally. In general, this means that we need a minimum of 3 constraints on any particular element. Since in this example we are creating a vertically scrolling scroll view, we would need a top, height, and bottom constraint.
There is one more important tip to keep in mind before we start adding constraints. When adding your constraints remember to make the very bottom constraint that constrains your last UI element to the superview a >= (great than or equal to) constraint. This will make it so that our Content View is allowed to be taller than its inner content area. Doing this will make it much easier to constrain other elements within the Content View and will prevent Xcode from complaining about conflicting constraints.
We are now ready to explore a few ways to fully constrain a particular UI element.
Note: The following steps only add vertical constraints. You will still need to add an additional constraint to fix your elements horizontally as normal.
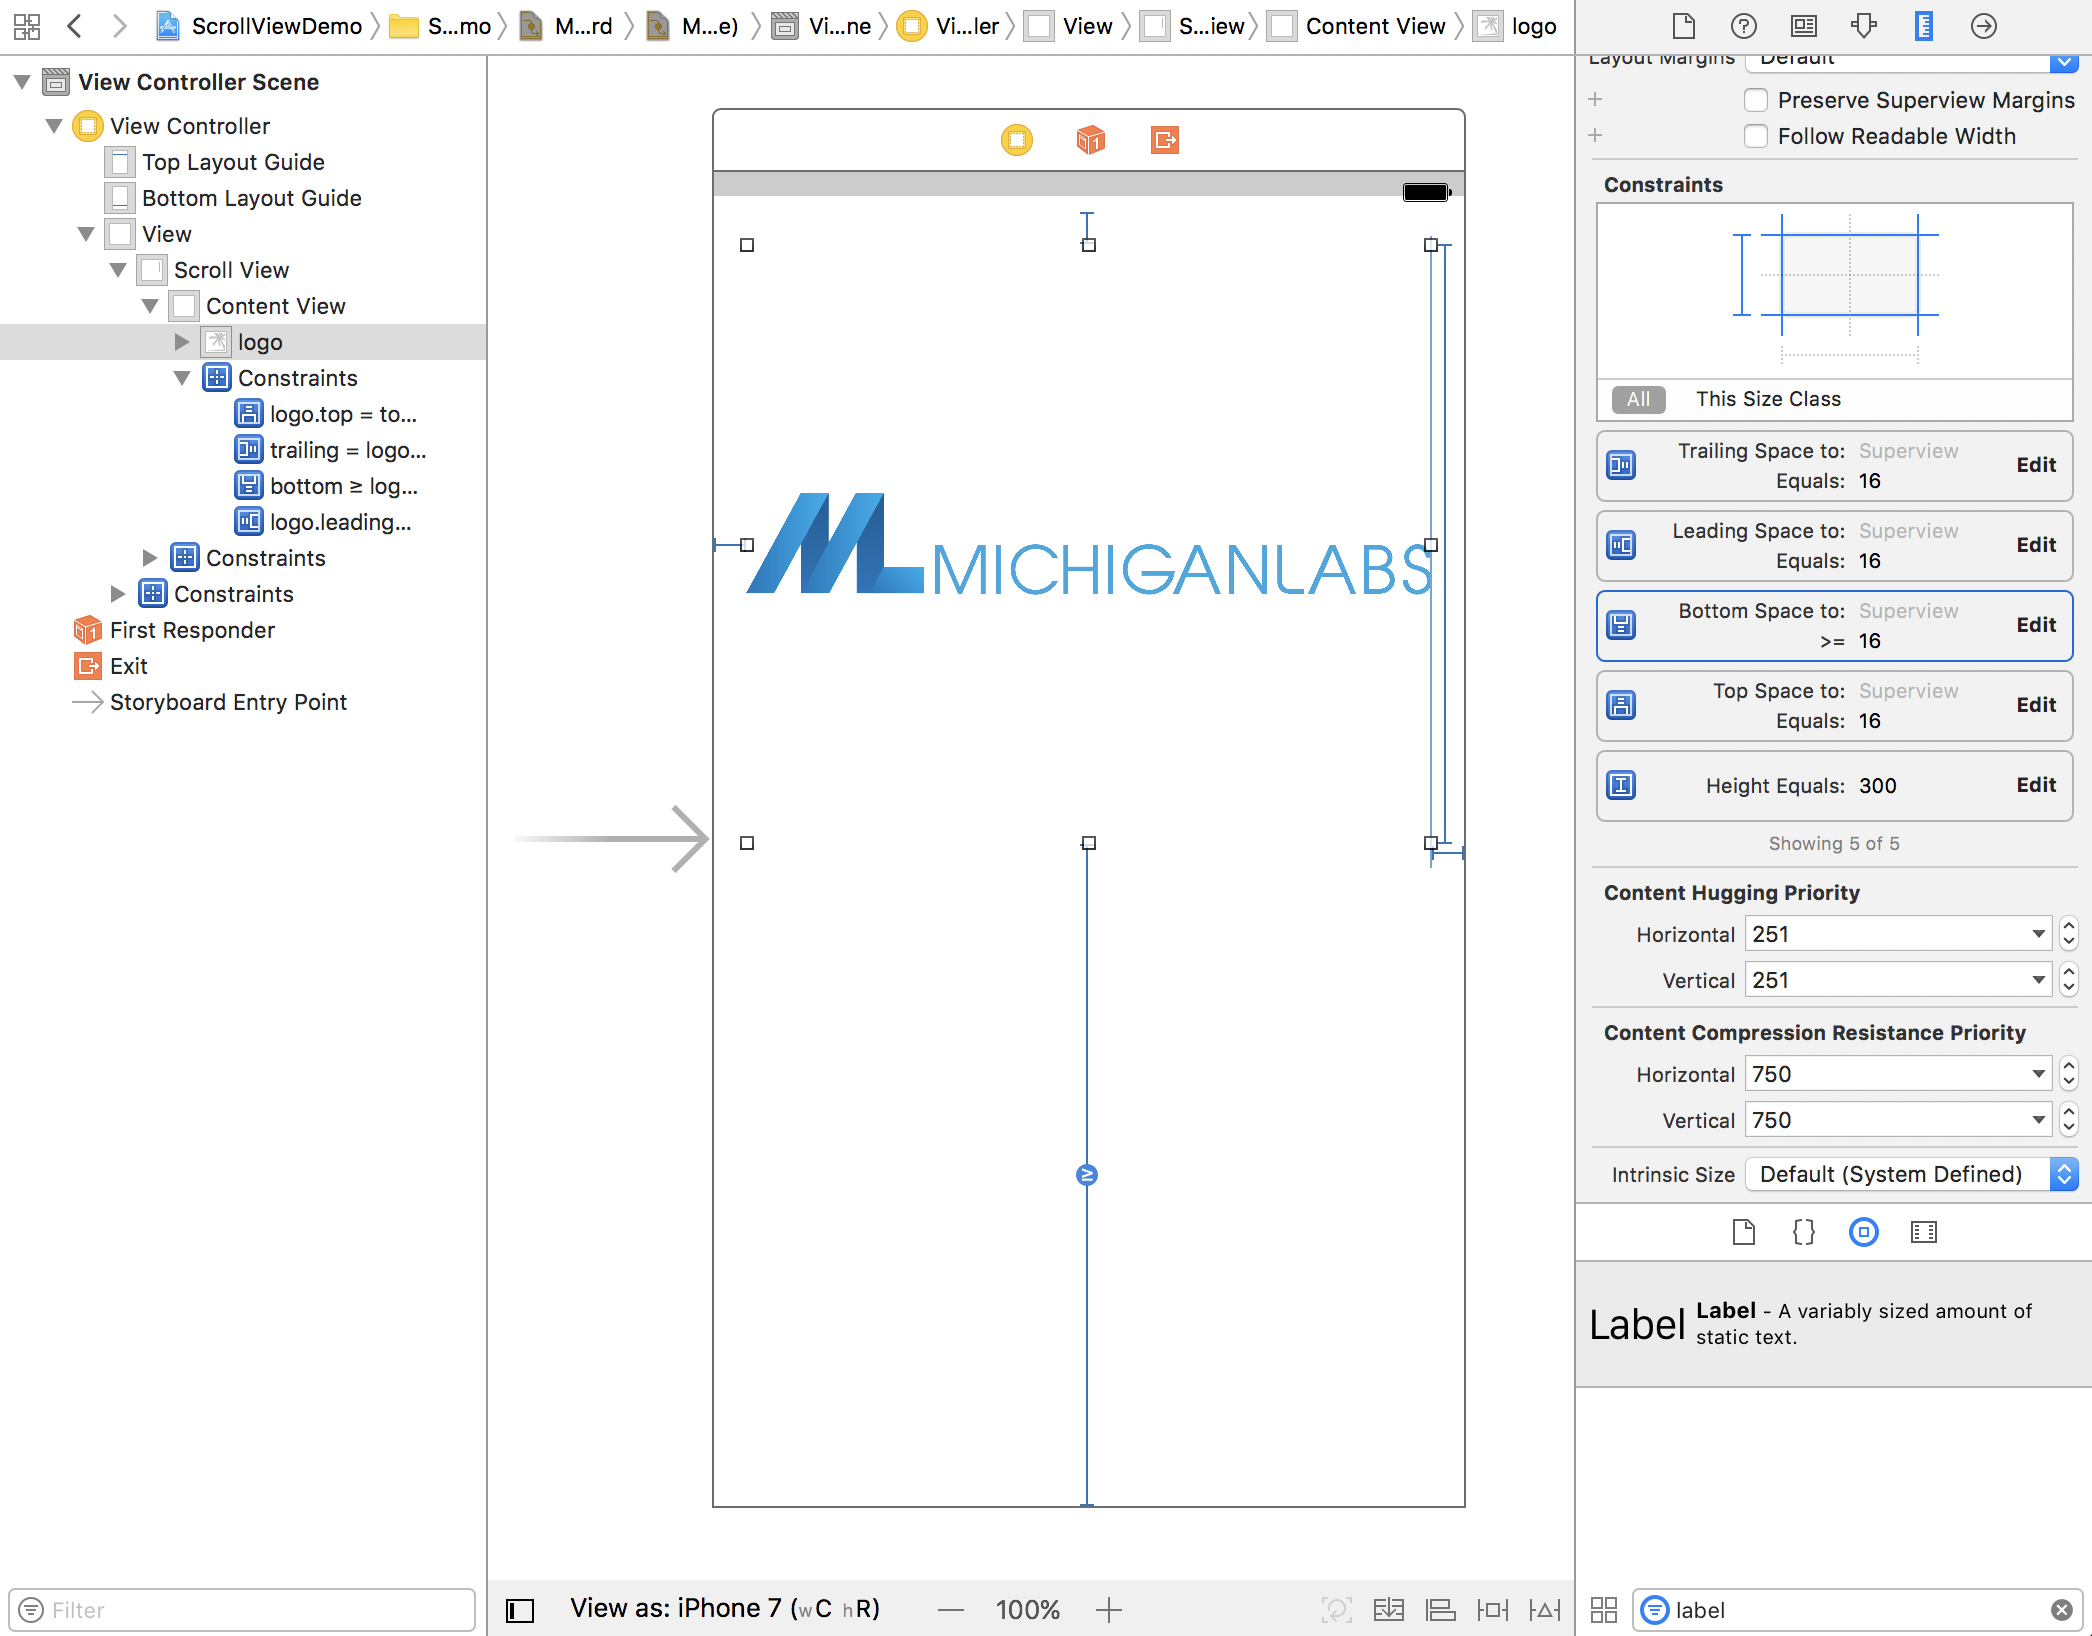
Simple UI Element
A lot of times we want static height/width elements in our scroll view such as UIButtons or UIImageViews. Elements that should have a static size are pretty simple to fully constrain.
- Add a constraint from the top of our element to either another view above it or the superview.
- Add a height constraint.
- Add a constraint from the bottom of our element to either another view below it or the superview.
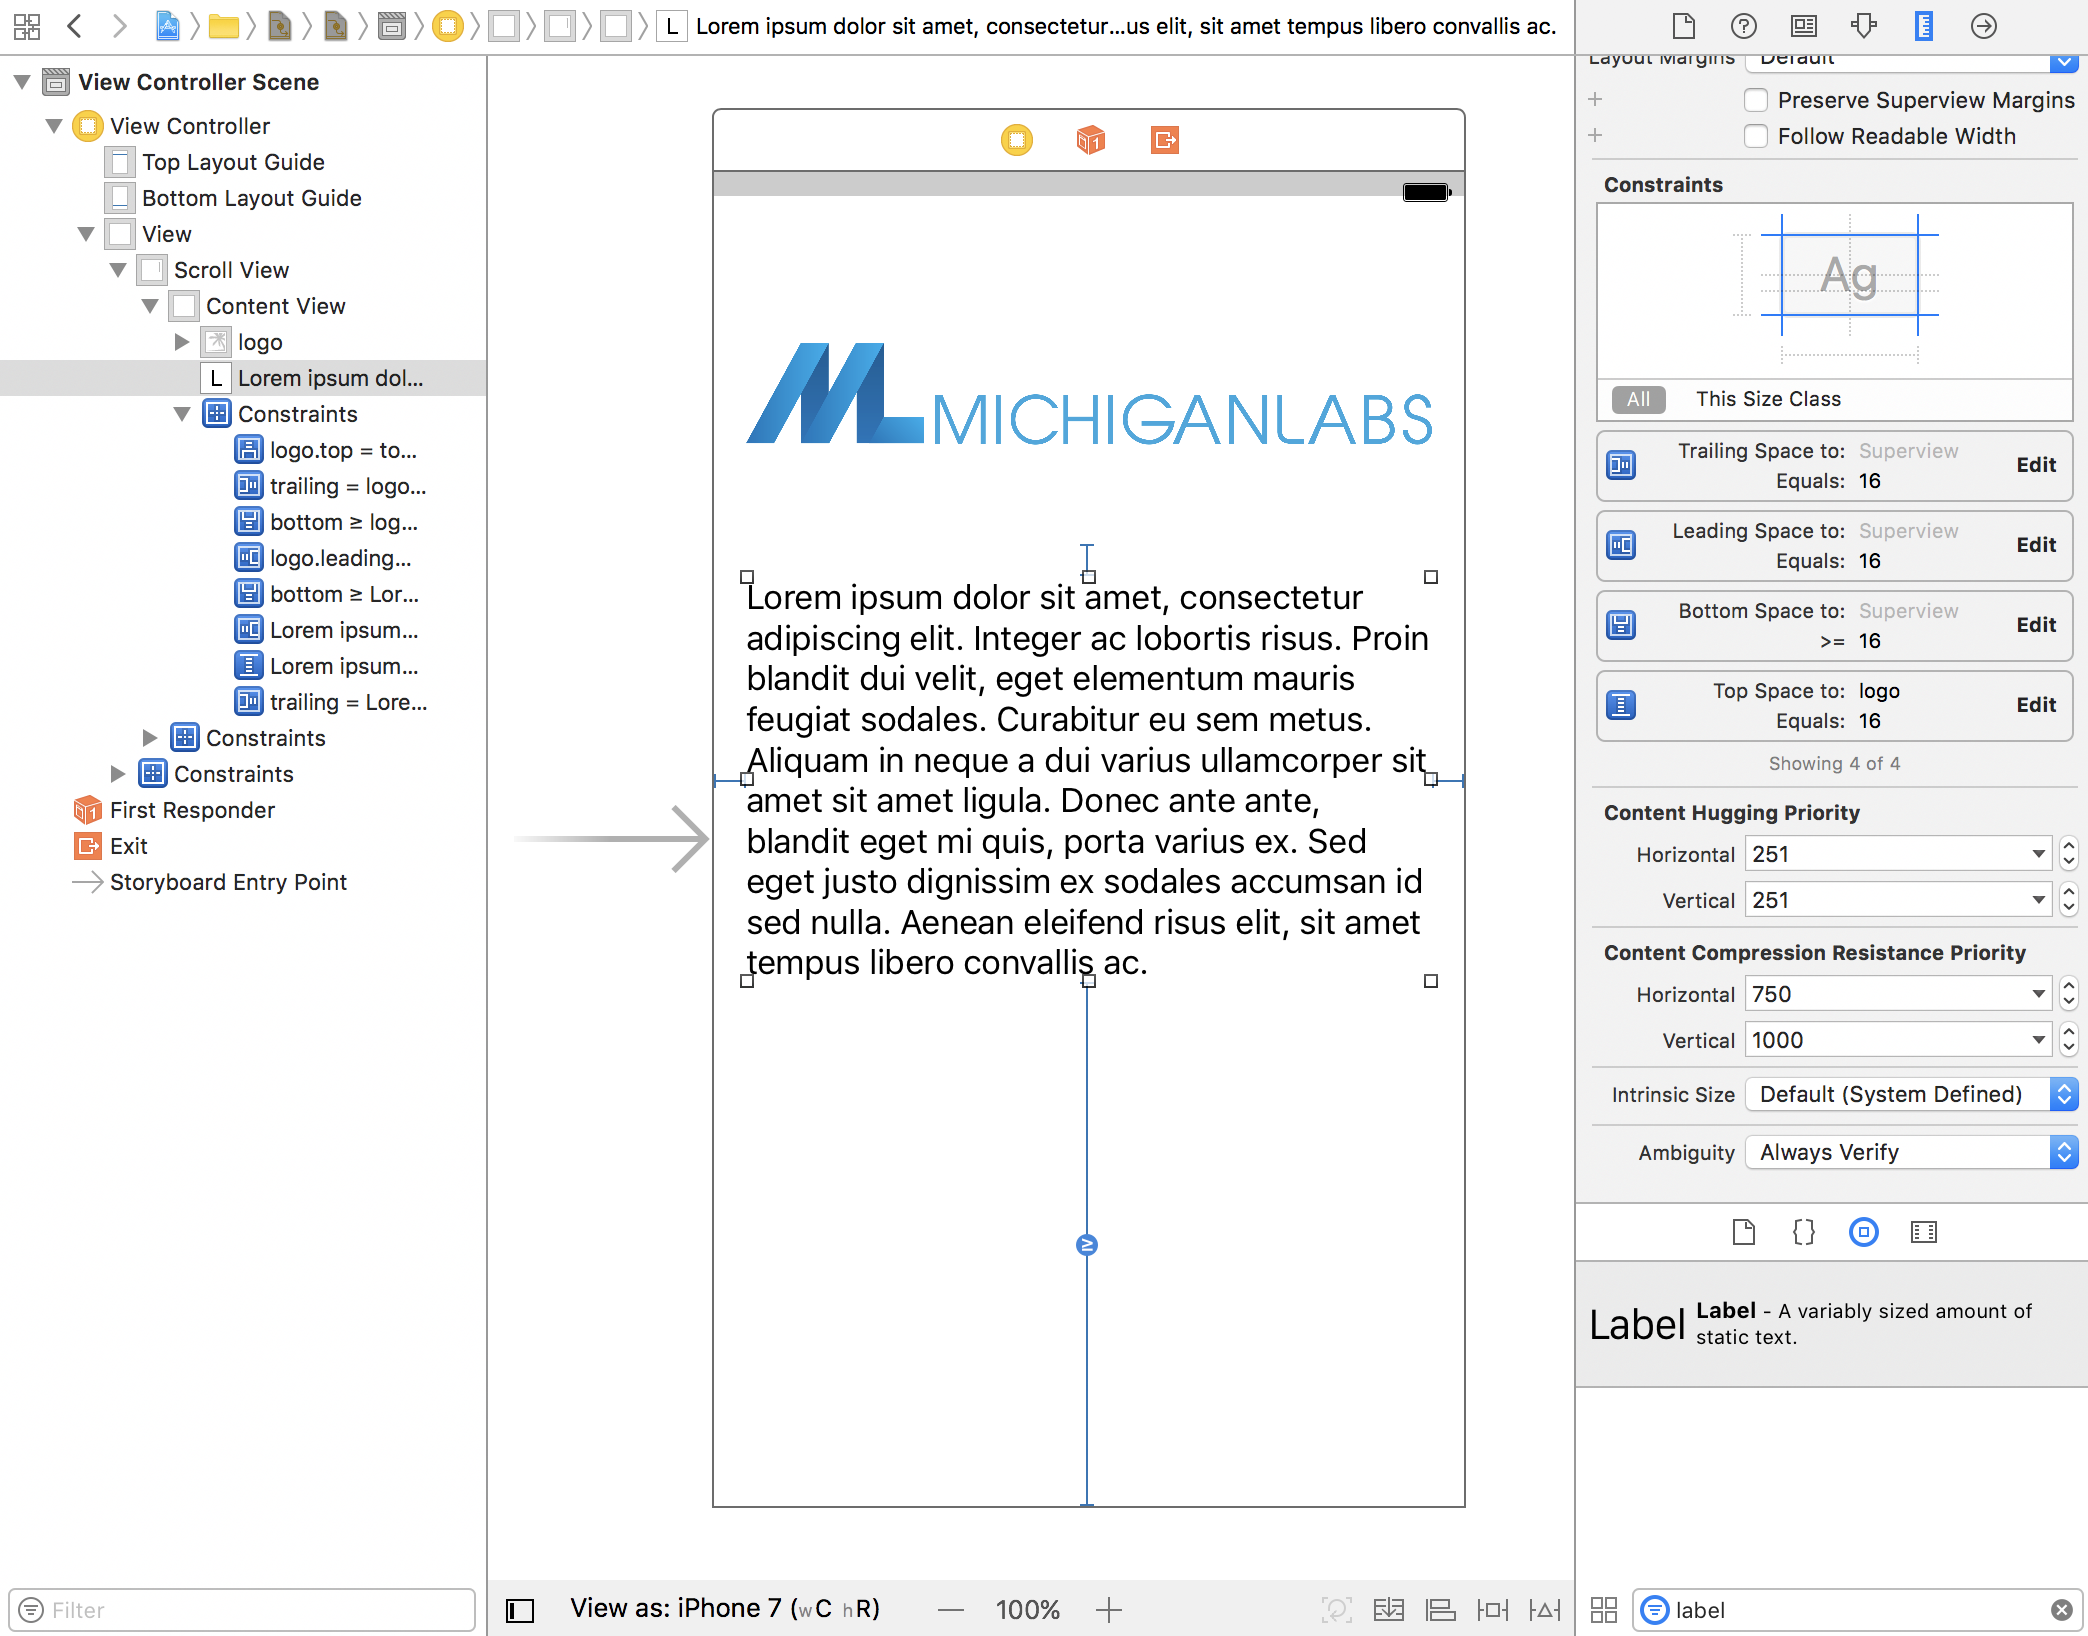
Dynamic content
There are other situations where we want to add an element which size is determined by its inner content. A simple example of this is a UILabel. A single-lined label is just as easy to constrain as a static size element since its height would never change. However, if the label is allowed to be multiple lines, constraining the label gets to be a little more difficult. Here is the setup that I’ve had the most success with.
- Add a constraint from the top of our element to either another view above it or the superview.
- Add a constraint from the bottom of our element to either another view below it or the superview.
- Set
Attribute Inspector > Linesto0 - Set the
Size Inspector > Vertical Content Compression Resistance Priorityto1000
This last step is the important one. It tells Auto Layout that the label should not be compressed at all and defines its height based on the lines of text. Therefore setting the compression resistance essentially takes the place of setting a height constraint in the previous example.
Scroll views within Scroll views
Now, what if we wanted to put another scroll view inside our Content View? … (brain explodes) …
With the right finagling, this too is doable - but first a word of caution. Scroll views nested in scroll views typically are not very user-friendly. I’m sure you’ve experienced it before while scrolling down a long page of content and then running into an embedded map view or copyright text view. If you want to get beyond those embedded views, you have to strategically place your finger (or cursor) outside the embedded view and on the parent view. If you are lucky, there will be a bit of margin for you to do so. Otherwise, you are stuck scrolling through the inner scroll view before you can continue scrolling through the main content.
Therefore my recommendation is that if you are placing a scroll view inside another scroll view, turn off scrolling on the inner scroll view so that the user thinks the view is just one long page of content.
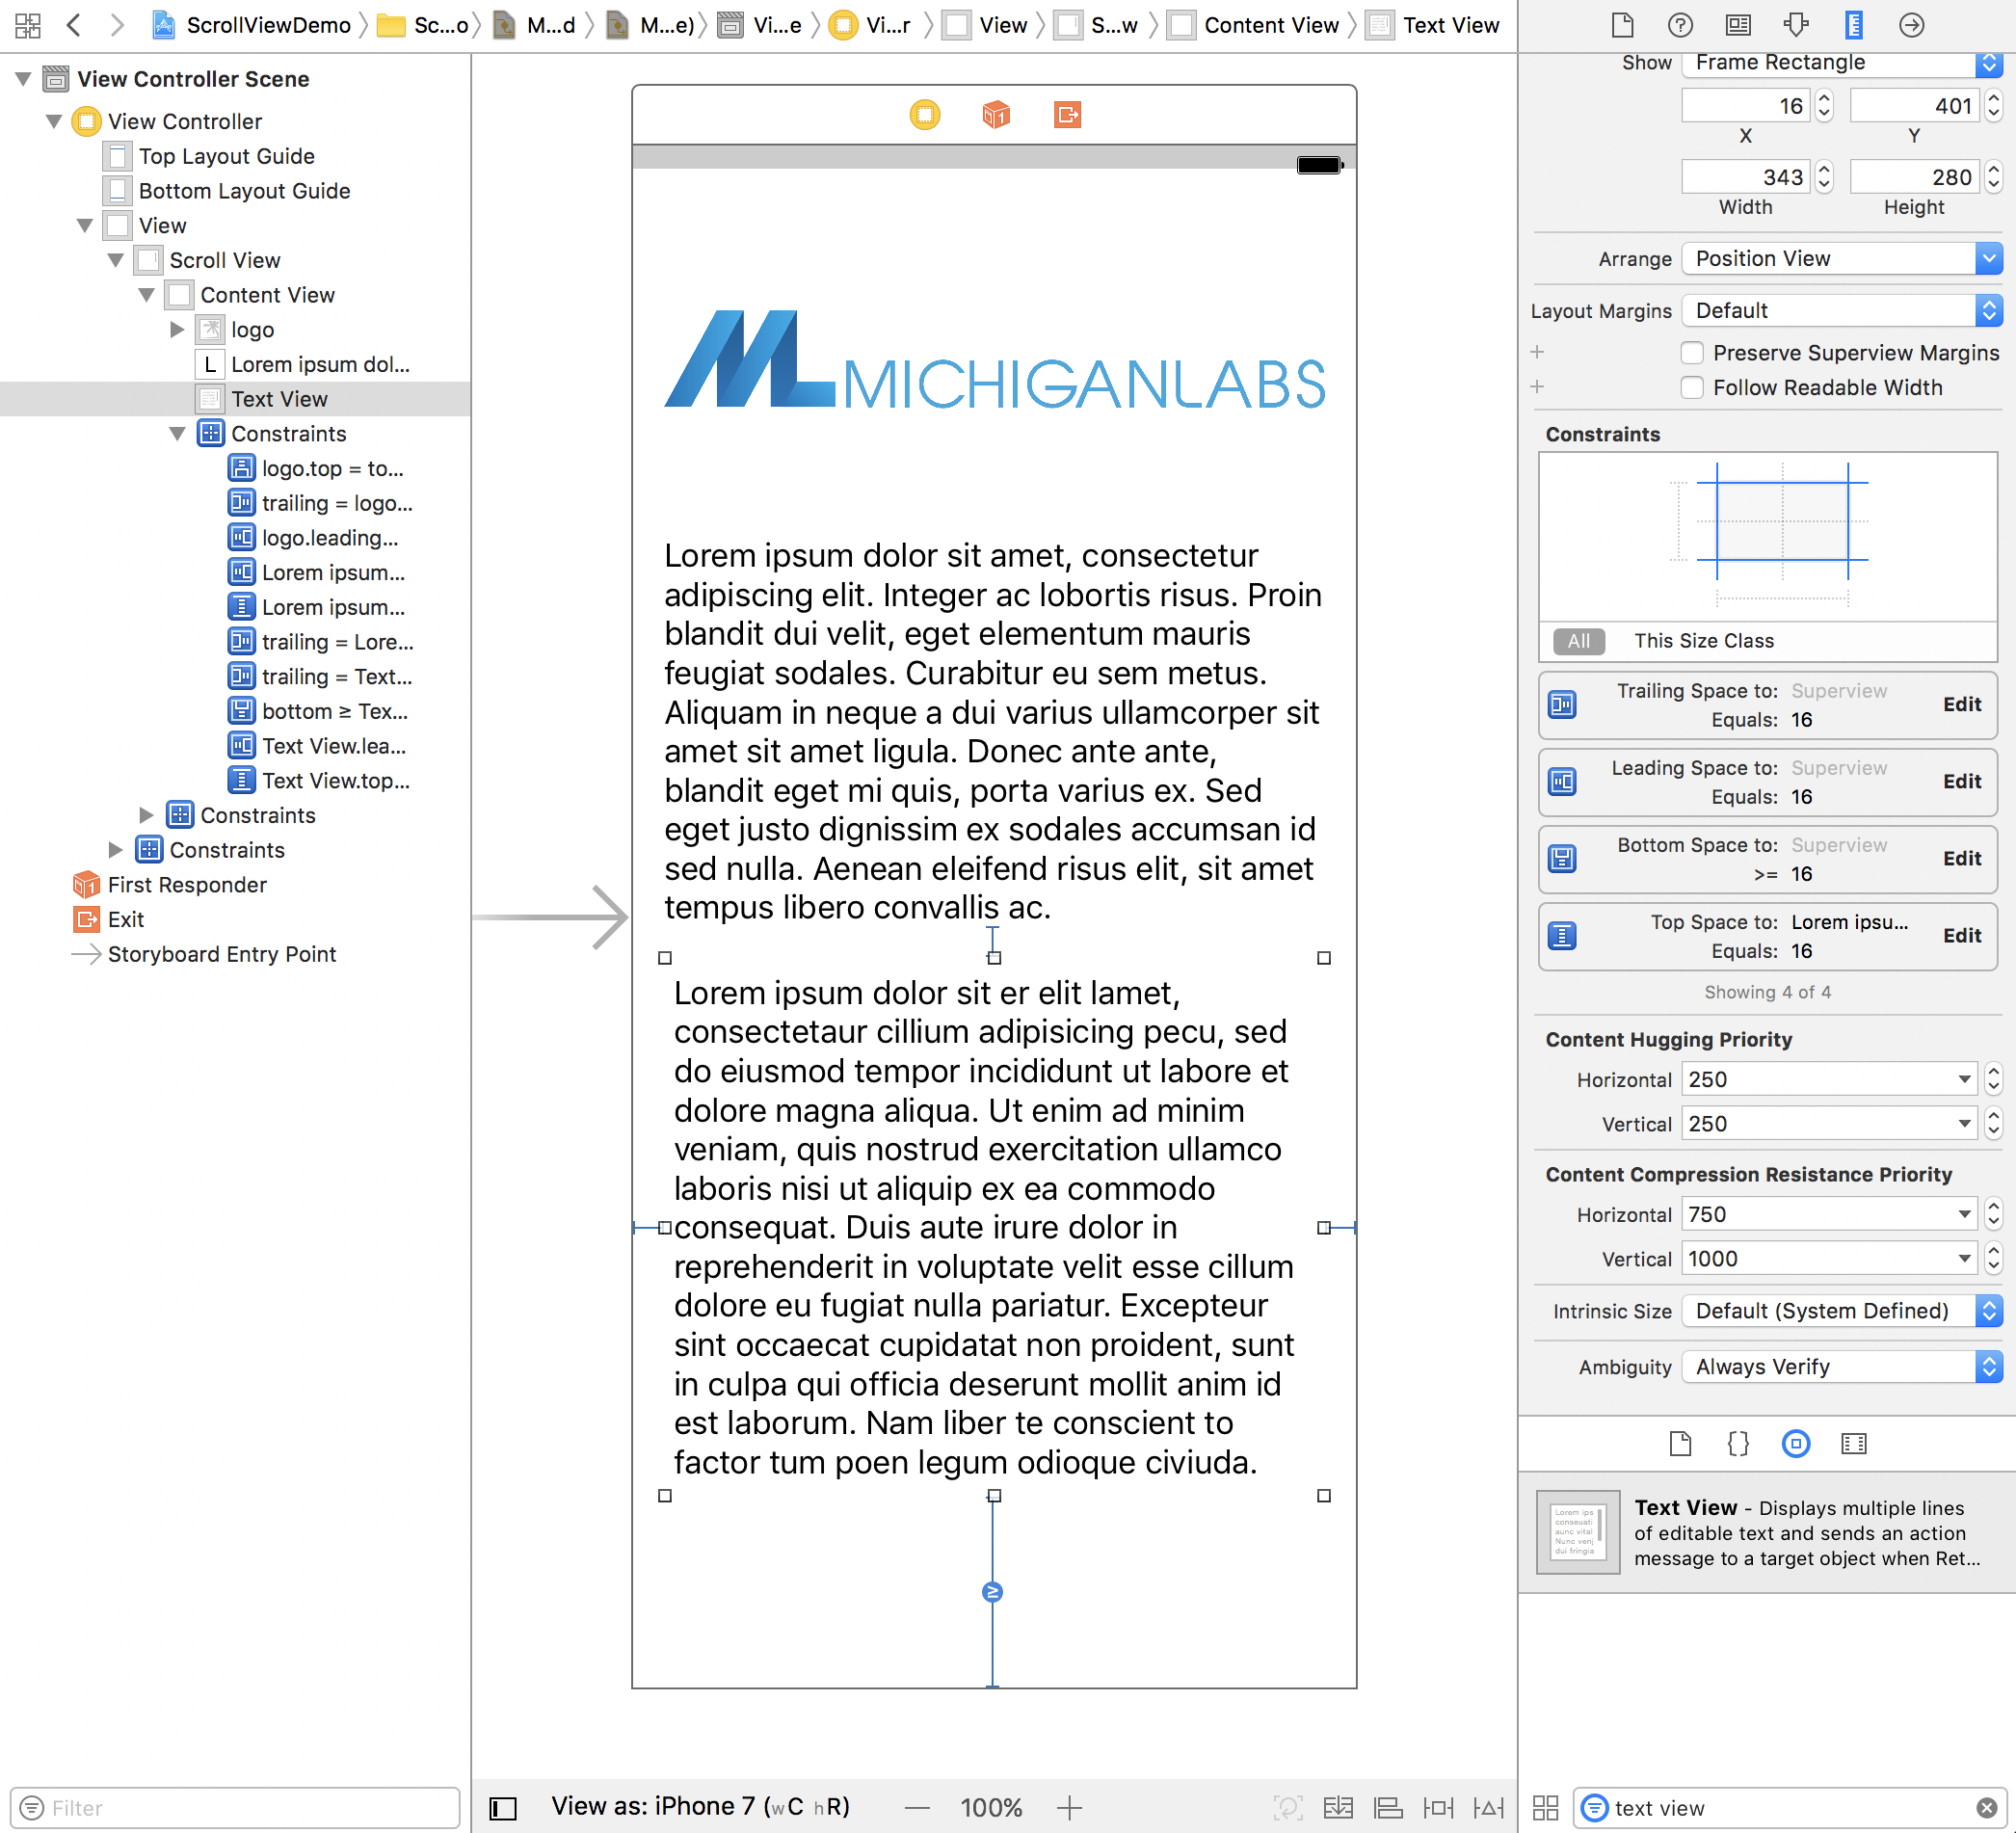
I will use a UITextView to demonstrate this behavior.
- Add a constraint from the top of our element to either another view above it or the superview.
- Add a constraint from the bottom of our element to either another view below it or the superview.
- Set the
Size Inspector > Vertical Content Compression Resistance Priorityto1000 - Un-check
Attribute Inspector > Scrolling Enabled
Observe how the UITextView now acts just like the UILabel in the previous example.
Note: As you put more and more items into the Content View, you’ll eventually need to increase the height of the View Controller so that all of your content fits visually within Interface Builder. To do so, simply change the
Attribute Inspector > Sizeproperty of the View Controller toFreeformand update theSize Inspector > Heightproperty to a value tall enough to fit your content.
Conclusion
Setting up a UIScrollView inside Interface Builder can be trickier than you would think it ought to be. In all fairness, there are many different ways to setup a scroll view and therein lies the complication of getting one setup to do exactly what you want. What I have touched on above is just one way you can setup a scroll view - but in my opinion, it is also the most common setup for most mobile applications. So hopefully with a few of these simple tips and tricks up your sleeve, you’ll be able to stop fighting with Interface Builder and get back to making your awesome app!

Looking for more like this?
Sign up for our monthly newsletter to receive helpful articles, case studies, and stories from our team.

Design
Process
UX Writing Tips
February 3, 2023Kai shares a few tips he's collected on how to write for user interfaces.
Read more
Team
Lessons Learned from our Associate Developer
September 13, 2023One of our Associate Software Developers, Rohit, reflects on his time at MichiganLabs working on a short-term project, what he learned about real-world development, and the software consultancy business model.
Read more
Team
2022 Best and Brightest Winners in West Michigan
May 2, 2022The Best and Brightest Companies to Work For® competition identifies and honors organizations that display a commitment to excellence in operations and employee enrichment that lead to increased productivity and financial performance!
Read more